Cameras How-To
The viewer has many camera types, there is the interactive viewer camera, which can be an orthographic or pinhole camera and multiple types of cameras that can be placed in the scene.
Main Interactive Camera
This is the default camera that is used by the viewer on startup, it’s an object of type ViewerCamera. This camera can be moved dragging the mouse and zoomed in using the mouse wheel, it can also be centered on selected objects by pressing X. It’s primarily meant for user interaction and is not rendered to the scene when viewing from other cameras, therefore it’s the only camera which is not a subclass of the Node class. This camera supports viewing the scene with a perspective (default) or an orthographic projection, this option can be toggled from the camera menu in the GUI or by pressing O.
Camera nodes
The viewer supports many camera types that can be added to the scene. These cameras appear as objects that can be selected or right-clicked to enable visualizations and to view the scene from their perspective. In combination with the Billboard class, this is especially useful to visualize pictures taken from a real-world camera and objects on top of them. When doing so, the view of these cameras has to match the dimensions and aspect ratio of the picture, therefore the constructor of the following camera objects all take cols and rows parameters specifying the width and height of the respective image. These parameters are also used to adjust the camera view when the window size does not match the aspect ratio of the camera to avoid stretching. If you are creating a camera with no underlying image, you can simply set these parameters to the window size viewer.window_size, which is a tuple (width, height).
Pinhole Camera
The class PinholeCamera implements a simple pinhole camera model. This camera is created from positions and targets parameters, which are the 3D positions of the camera and of a point that the camera should face towards. Each parameter can be a single 3D vector or a numpy array of 3D vectors of shape (N, 3) describing a sequence of N frames. The field of view of the camera can be set using the fov parameter. For simplicity this camera always assumes a centered center of projection, no skew and a vertical up vector in the positive Y direction. A more flexible model is implemented by the OpenCVCamera class. An OpenCVCamera node can be created from a PinholeCamera using the pinhole_camera.to_opencv_camera() method.
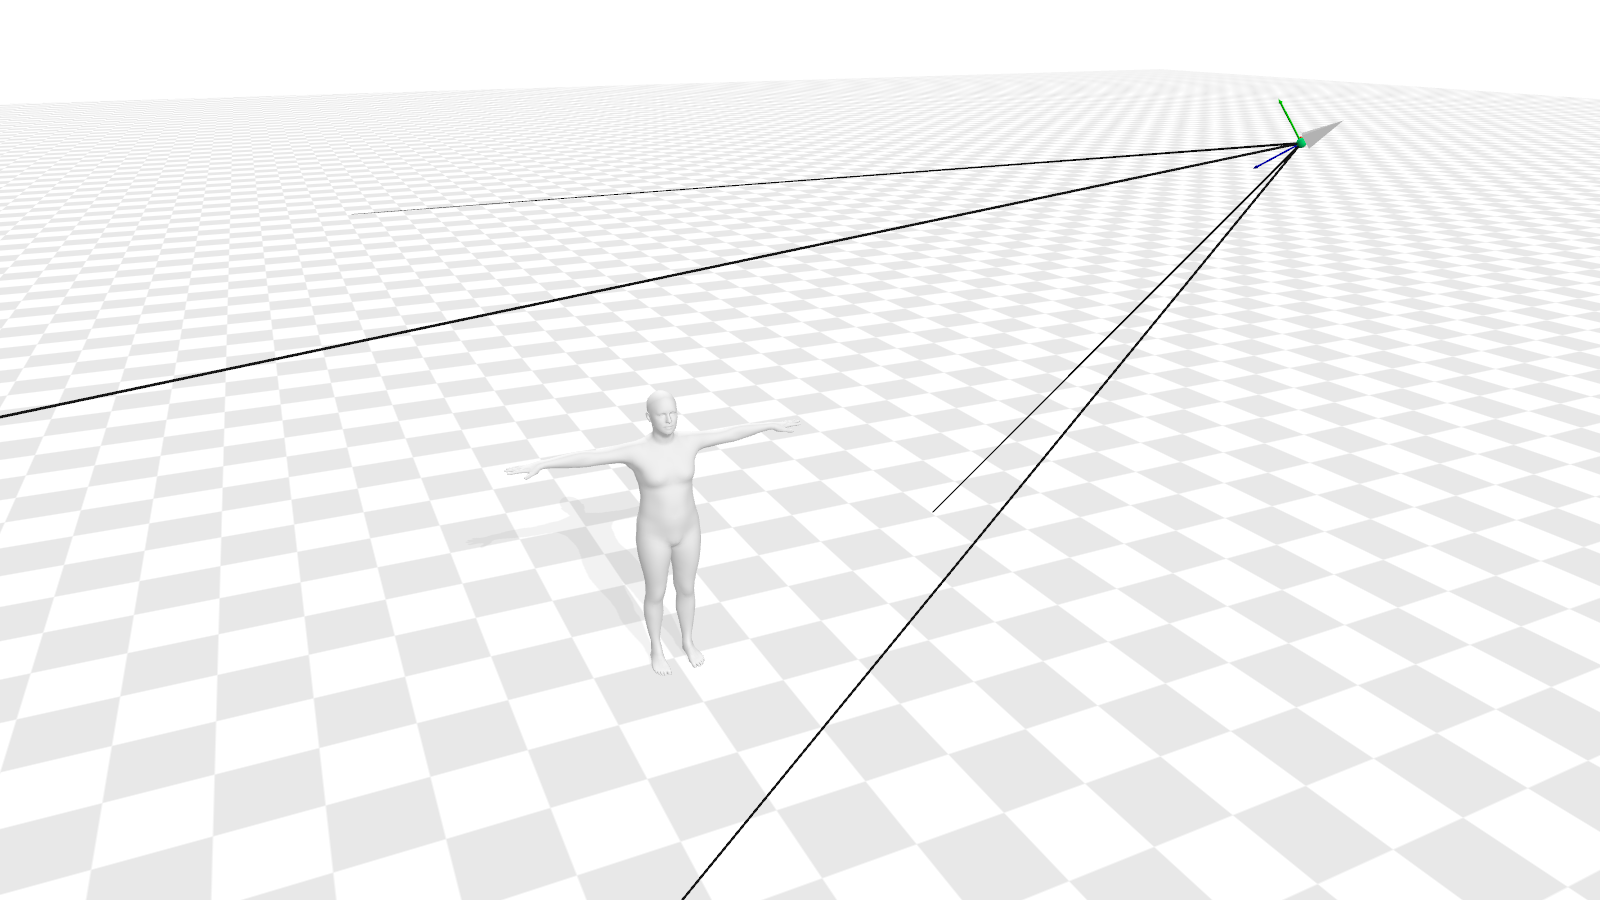 |
|---|
Pinhole camera in the camera_path.py example |
OpenCV Cameras
The class OpenCVCamera implements the pinhole camera model following OpenCV conventions. This camera is created from an intrinsic matrix (K of shape (3, 3)) and an extrinsic matrix (Rt of shape (3, 4)), these parameters can also be arrays of matrices to describe a sequence of frames. A PinholeCamea node can be created from an OpenCVCamera using the opencv_camera.to_pinhole_camera() method. This conversion is available for convenience but should be used with care since it can lead to loss of information as the PinholeCamera uses a simpler model (see above).
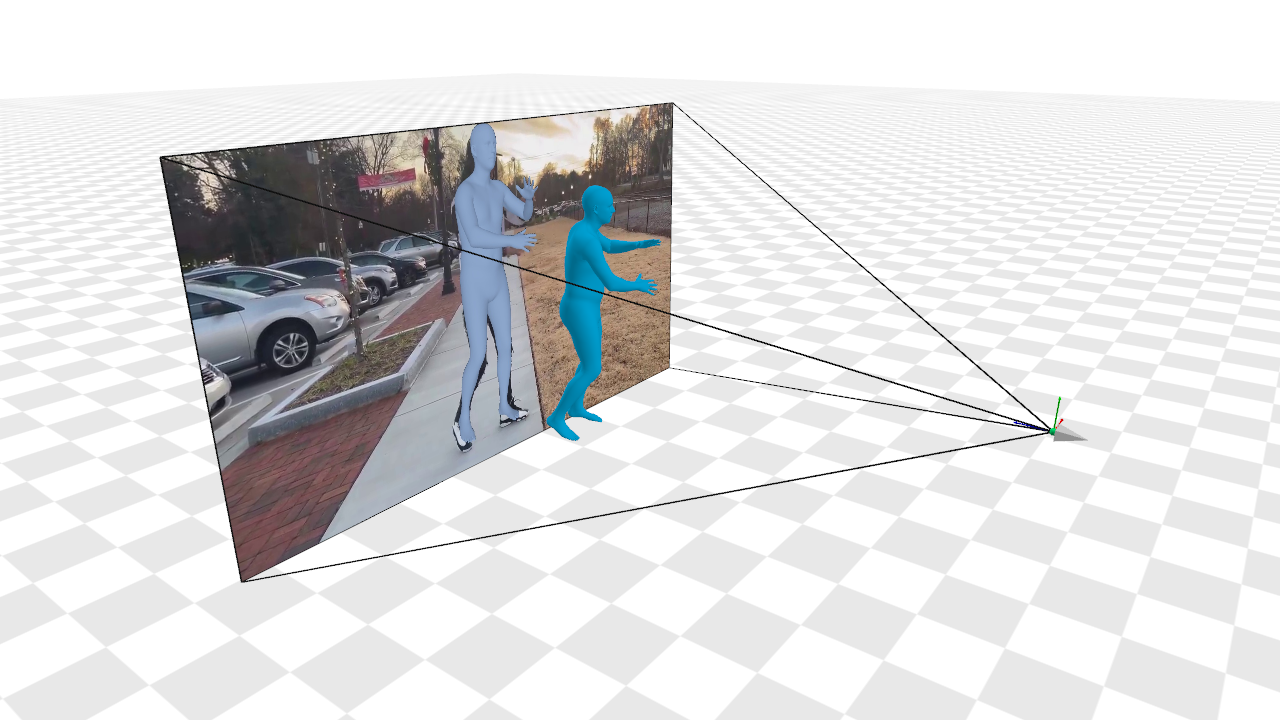 |
|---|
OpenCV camera in the load_ROMP.py example |
Weak Perspective Camera
The class WeakPerspectiveCamera implements the weak perspective camera model. It is created from scale and translation parameters which are 2D vectors or arrays of shape (N, 2) describing a sequence of N frames. This camera is always placed at (0, 0, 1) and looking in the negative Z direction with positive Y up. This represents an identity extrinsic matrix following the Y up conventions of the viewer. If data using a different convention is being loaded in the viewer, we suggest transforming it to Y up by setting the rotation matrix of nodes created from it.
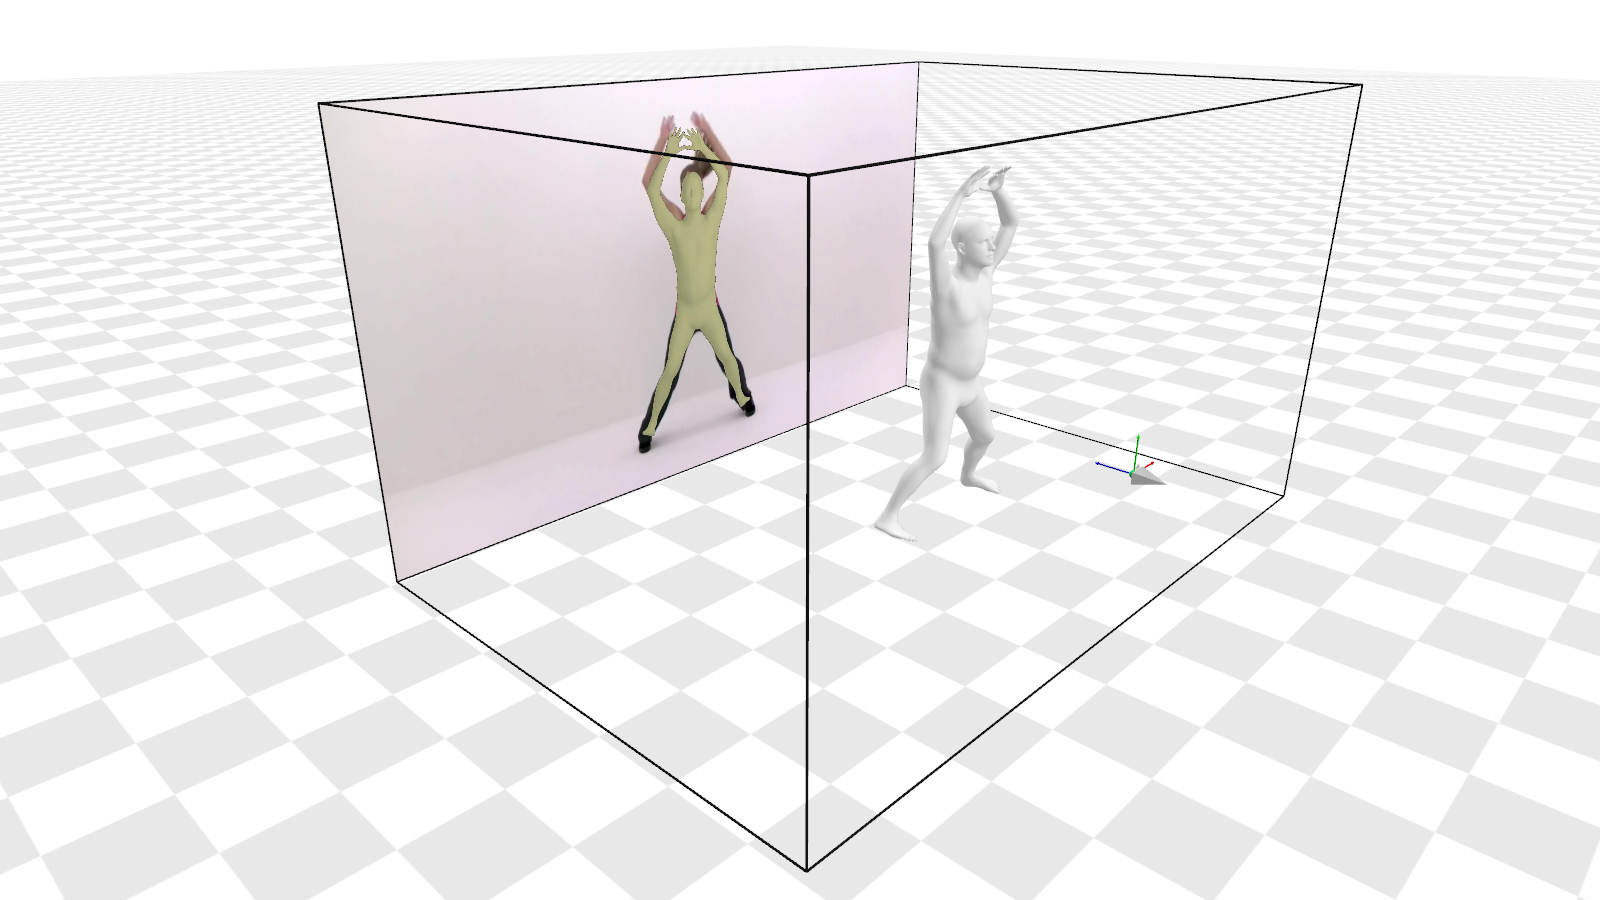 |
|---|
Weak perspective camera in the load_VIBE.py example |
Camera Paths
The module aitviewer.utils.path implements utilities for creating sequences of camera positions and targets, which are useful for creating animated PinholeCamera objects. Currently, this module exposes the following functions:
circle()andline()that return an array of shape(N, 3)representing a sequence of 3D positions in a straight line or a circle respectively.lock_to_node()that returns a tuple of(positions, targets)that can be used to create aPinholeCamerafollowing an object.
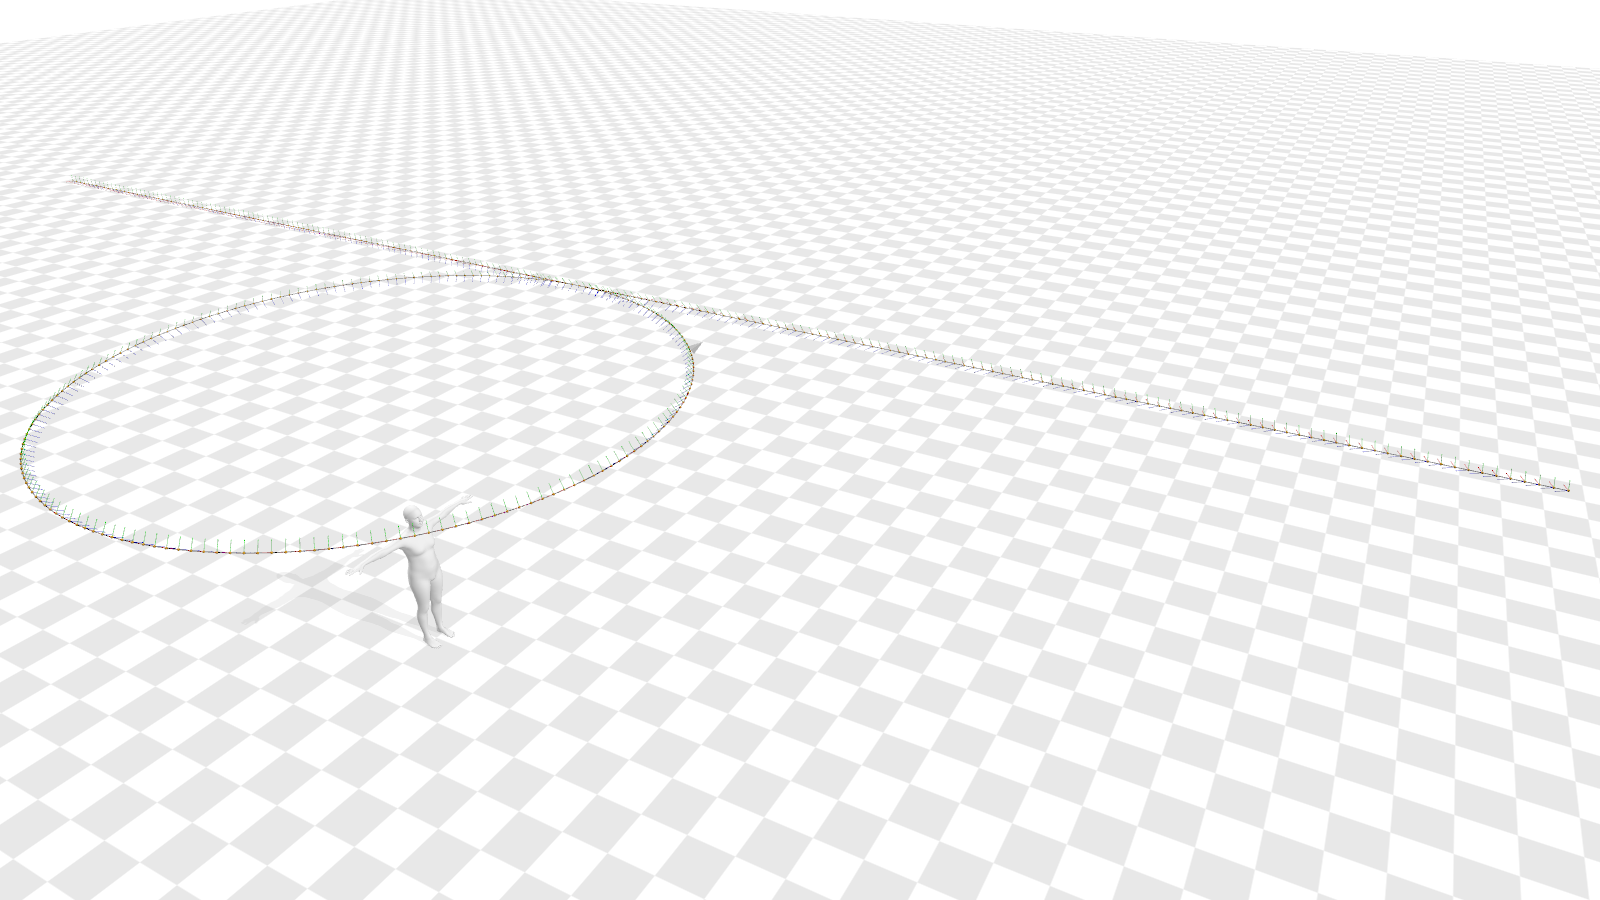 |
|---|
Camera path visualization in the camera_path.py example |
Multi-view Systems
A MultiViewSystem is a renderable that groups a set of cameras as OpenCVCamera nodes and images as Billboard nodes. It is created from a .npz file describing the camera setup a directory containing pictures taken from the cameras. See the documentation in aitviewer/renderables/multi_view_system.py for more details.